How to Digitize Embroidery Logos Right
- May 9, 2026
- 2:15 am
A logo can look sharp on a screen and still sew out poorly on a polo or cap. That gap is exactly why businesses ask how to digitize embroidery logos before placing an order. Digitizing is not just converting artwork into a stitch file. It is the process of planning how your logo will actually run on fabric, under thread tension, on a specific garment, with the cleanest possible finish.
For business apparel, that matters. A well-digitized logo helps uniforms look consistent across departments, keeps brand marks readable on smaller placements, and reduces production delays caused by thread breaks, distorted shapes, or poor registration. If your goal is polished branded apparel that holds up across repeat orders, digitizing is where quality starts.
What digitizing really means
Embroidery machines do not read a JPG, PNG, PDF, or even a vector file the way a printer does. They need a stitch file built with directions. That file tells the machine where to start, what stitch type to use, which direction the stitches should run, when to trim, when to change thread colors, and how dense the fill should be.
That is why digitizing is part technical setup and part production judgment. A logo with thin lines, tiny type, gradients, or overlapping effects often needs to be simplified for embroidery. The best result is not always the most literal copy of the artwork. It is the version that preserves the brand while stitching cleanly on the garment you chose.
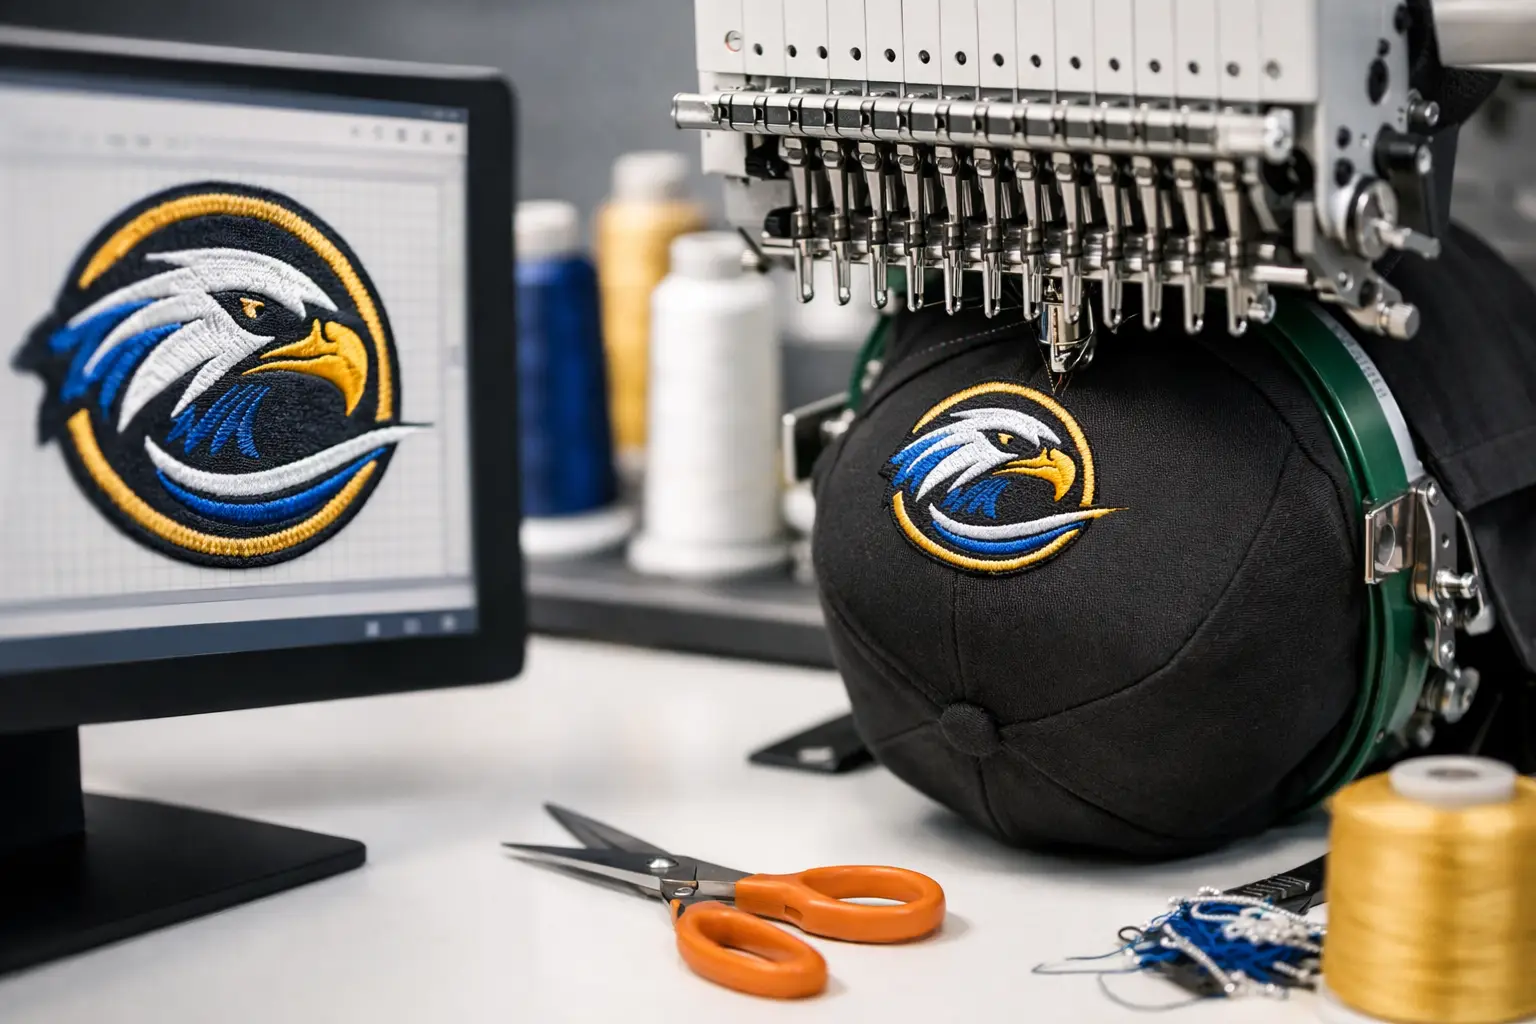
How to digitize embroidery logos step by step
Start with the best artwork you have
Clean source art makes the process faster and more accurate. Vector files such as AI, EPS, or editable PDF are usually the strongest starting point because shapes and text are easier to define precisely. High-resolution raster files can work, but low-quality screenshots or compressed web graphics usually create guesswork.
If your logo includes very small text, fine outlines, or effects like shadows and gradients, expect some adjustment. Embroidery has physical limits. Thread has width. Fabric has movement. What looks crisp in print may need to be redrawn or simplified to sew properly.
Choose the logo size and placement first
Digitizing should be built around the finished use, not treated as a one-size-fits-all file. A left chest logo on a polo, a front cap logo, and a full back jacket logo each require different stitch strategies. The same art may need separate files because size, backing, fabric type, and sewing field all change how the logo performs.
This is where many avoidable issues begin. If a file is digitized for a larger jacket placement and then reduced too far for a chest logo, text can fill in and shapes can lose definition. Planning the exact size up front helps protect the final appearance.
Map each element to the right stitch type
Most embroidery digitizing relies on three primary stitch categories: satin stitches for borders and lettering, fill stitches for larger areas, and running stitches for details or underlays. The right choice depends on the width and shape of each logo element.
Satin stitches work well for clean lettering and columns, but only within a certain width range. Fill stitches are more stable for broader shapes. Running stitches can sharpen details, but they are not a fix for artwork that is simply too small to embroider clearly. Good digitizing balances visual accuracy with what thread can realistically hold.
Set stitch direction, sequence, and pathing
This is where experienced digitizing shows. Stitch direction affects how light reflects off the thread, how shapes appear, and how much the fabric pulls during sewing. Sequence matters too. The machine should run the logo in an order that supports clean registration and minimizes unnecessary trims and jumps.
Pathing also affects production speed and consistency. A file that is technically usable but inefficient can add time, increase thread breaks, or create a rougher finish. For larger uniform programs or recurring orders, those details matter more than most buyers realize.
Add compensation for fabric pull and push
Embroidery changes fabric. As stitches form, they pull material inward and can push edges out of position. Digitizers account for this with pull compensation, underlay choices, density adjustments, and stitch angles.
This is one reason automatic conversion tools often miss the mark. They may generate a file, but they do not always account well for the behavior of pique polos, structured caps, fleece jackets, or stretch fabrics. A logo that looks fine on flat backing may distort on the actual garment if the file was not built with the material in mind.
Why garment type changes the file
A logo for a smooth woven shirt behaves differently than the same logo on a textured performance polo. Caps add another layer of complexity because of seams, curvature, and hooping constraints. Outerwear may need more stability, while fleece can swallow small details.
When businesses order embroidered apparel across multiple categories, it is smart to ask whether one file will truly work across all pieces. Sometimes it will. Sometimes a cap version, a left chest version, and a larger bag or jacket version will each deliver a better result. That extra setup protects your brand presentation.
Common issues when digitizing embroidery logos
The most common problem is trying to force print-style detail into embroidery. Tiny taglines, thin outlines, and subtle shading often need to be removed, enlarged, or reworked. Another issue is poor density balance. If stitches are too dense, the design can look bulky and create puckering. If density is too light, coverage may look weak or uneven.
Lettering is another frequent trouble spot. As a practical rule, small embroidered text needs room to breathe. If your logo includes fine script or stacked wording, the best move may be to create an embroidery-friendly version rather than insisting on the exact print lockup.
Color choices can also shift in thread. Thread has sheen, and embroidered colors can read differently than on a screen. Brand consistency still matters, but thread matching often involves selecting the closest available embroidery color rather than expecting an exact digital match.
Manual digitizing vs. auto-digitizing
If you are comparing options, this is the trade-off that matters most. Auto-digitizing software can be useful for simple art and quick mockups, but it often struggles with production-level quality. It may assign too many stitches, create awkward paths, or mishandle small details.
Manual digitizing takes more expertise, but it gives the file a better chance of sewing cleanly on the intended garment. For company uniforms, branded outerwear, team apparel, and repeat programs, manual refinement is usually worth it. The result is better stitch quality, fewer surprises in production, and a more consistent logo across reorders.
How to prepare your logo for embroidery success
If you want the smoothest process, send the cleanest art available and be clear about where the logo will be used. Share the garment type, placement, target size, and any brand standards that matter. If there are elements you cannot lose, point those out early.
It also helps to stay open to expert recommendations. A trusted embroidery partner may suggest increasing text size, thickening lines, or adjusting spacing. Those changes are not shortcuts. They are often what turns a difficult logo into a clean, durable embroidered mark.
What a proof can and cannot tell you
A digital proof is useful for checking layout, size, and thread colors, but it does not always show how the stitches will interact with real fabric. Texture, loft, garment stretch, and thread sheen affect the final appearance.
That is why production experience matters. A dependable decorator knows when a logo is likely to present issues before it reaches the machine. For larger programs or logos with tight detail, asking the right questions up front can save time and protect your brand image.
When to create a separate embroidery version of your logo
Not every logo should be embroidered exactly as designed for print or web. If your mark includes gradients, ultra-fine detail, small trademark text, or layered transparency effects, an embroidery version is often the right move. That version keeps the brand recognizable while making the art more stitch-friendly.
For many business buyers, this is the smartest long-term approach. It creates a clean standard for polos, caps, jackets, uniforms, and bags, and it supports consistency when different teams reorder over time. At LOGO USA, that kind of practical adjustment is often what helps a brand look more professional in the field, not less.
What to expect from a professional digitizing process
A professional process should feel straightforward. You provide your artwork, garment details, logo size, and placement. The digitizer builds the file for embroidery, not just for appearance on a screen. Then the design is reviewed for stitch quality, readability, and production fit.
The real value is not just getting a file. It is getting a file that runs efficiently, looks polished on the selected apparel, and supports dependable repeat results. For businesses managing employee uniforms, event apparel, or branded merchandise, that reliability is a major part of the return on investment.
If you are deciding how to digitize embroidery logos, the safest approach is to think beyond conversion and focus on execution. A clean stitch-out starts with the right art, the right garment plan, and a digitized file built for real-world production. When those pieces line up, your logo does what it is supposed to do – represent your brand with confidence every time it is worn.
Popular Blogs
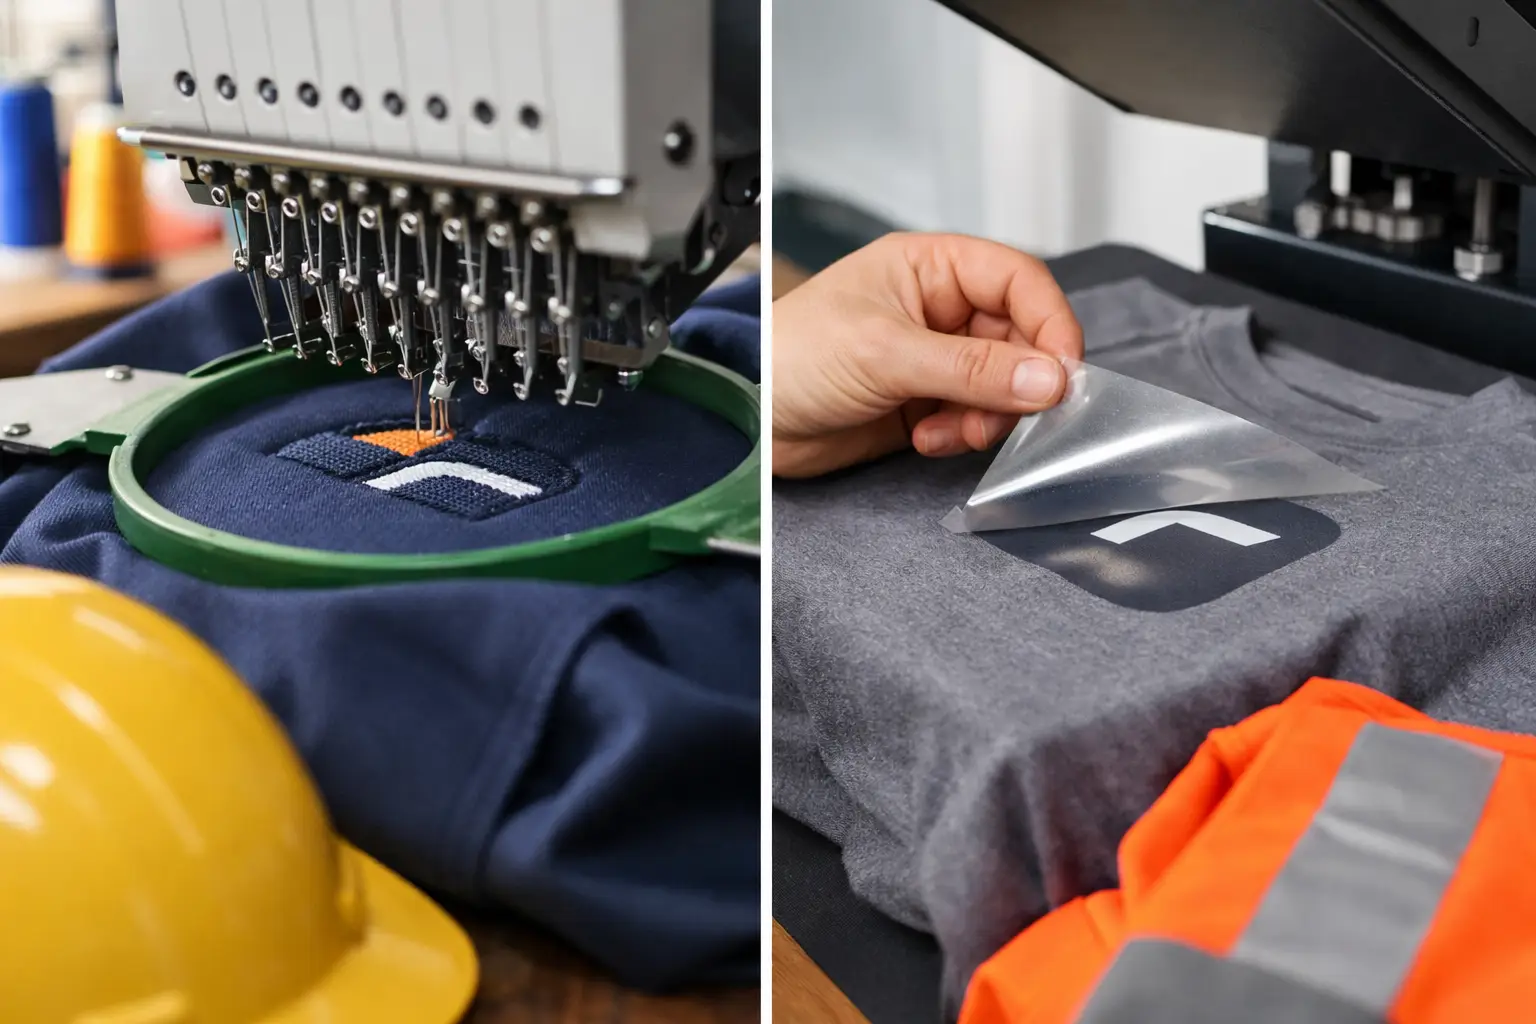
Embroidery Versus Heat Transfer for Workwear
July 12, 2026