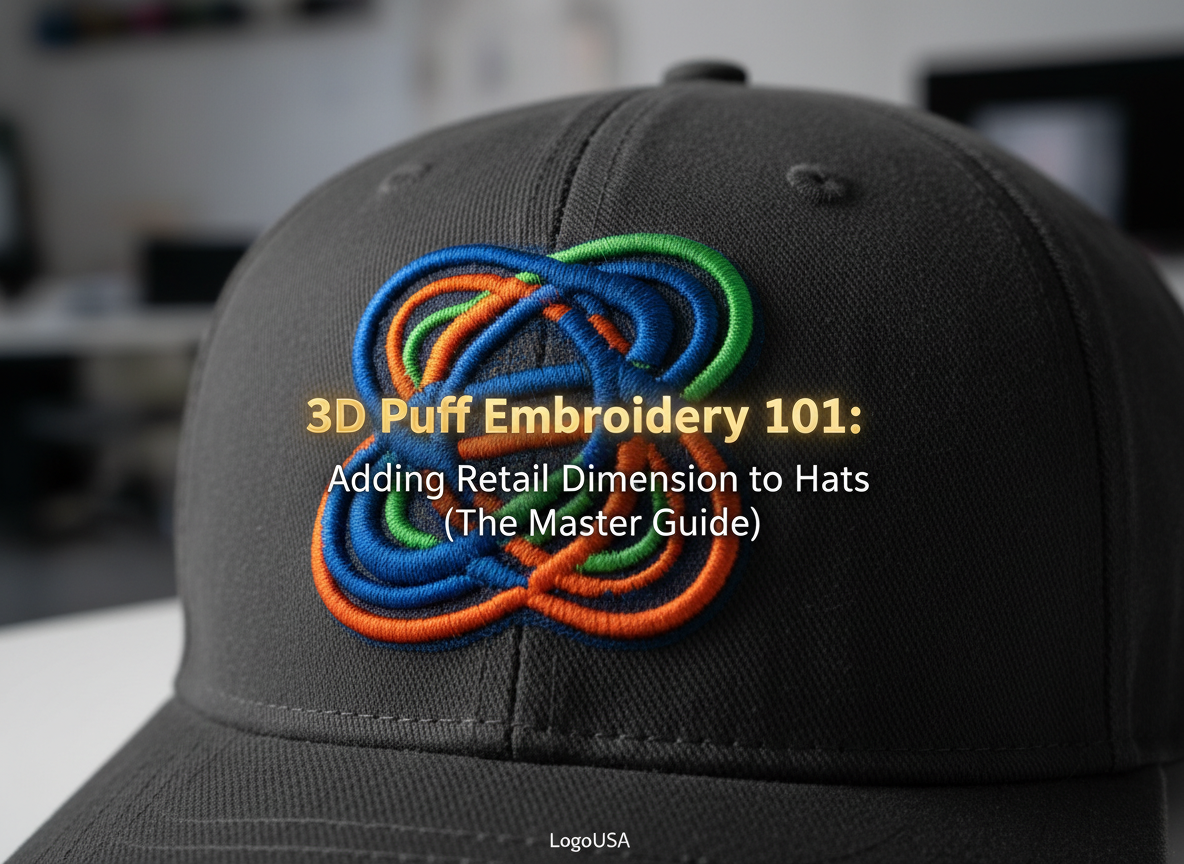
3D Puff Embroidery 101: Adding Retail Dimension to Hats (The Master Guide)
- February 15, 2026
- 10:00 pm
Modern streetwear is built on presence. If your logo sits flat on a hat, it disappears in a crowded retail space. 3D puff embroidery changes that instantly. It lifts your design off the fabric, creating bold depth that customers can see from across the room and feel in their hands. That raised dimension signals quality before anyone even checks the price tag.
Professional sports leagues like the MLB and NBA rely on this technique because visibility matters. A raised logo delivers sharper definition under stadium lights and on camera. It communicates authenticity, structure, and premium construction in a single glance.
Texture also changes perception. When customers touch dense, elevated stitching, they associate it with craftsmanship and durability. That physical dimension increases perceived value and supports higher retail pricing. 3D puff embroidery is not decoration. It is strategic brand elevation.
For modern decorators, the process blends engineering with creativity. Foam placement, stitch density, and machine calibration must work together precisely to produce clean architectural results that hold their shape over time.
The Mechanics: How 3D Puff Embroidery Works
True volume requires more than just extra thread. We treat 3D puff embroidery as an architectural process of encapsulating space. You are not just sewing; you are building a physical structure on the fabric. This method traps air and foam to create a permanent 3D shape.
The Layering Process
Success depends on a perfectly synchronized system. First, the machine lays down a light tack-down stitch on the garment. Next, you place the specialized foam over the target area. The top satin stitches then wrap tightly around the foam to seal the edges. Finally, the needle shears the excess material to reveal a clean, raised design.
3D Puff vs. Standard Flat Stitches
| Feature | Standard Flat Stitches | 3D Puff Embroidery |
| Stitch Count | Lower density requirements | Requires 2x to 3x more density |
| Visual Impact | Subtle and traditional | Bold, high-definition depth |
| Production Complexity | Simple and fast | Requires precise tension and foam |
Essential Tools and Materials for Success
Your final product depends entirely on the quality of your core materials. Use a foam that offers consistent density and rebound. The needle must stay sharp enough to shear the foam cleanly during the process. Even a slight drop in tool quality will ruin a premium 3D puff embroidery design.
Selecting High-Density Embroidery Foam
Most decorators choose between 2mm and 3mm foam heights. A 2mm foam works best for fine details and smaller logos. Use 3mm foam for maximum height with large, bold block letters.
Pro Tip: Always match your foam color to your thread color. This trick hides any small foam peaks that might poke through the stitches.
Needle and Thread Requirements
You must use sharp 75/11 needles for this specific work. These needles cut through the foam without dragging or tearing the material. High-tenacity polyester thread is also mandatory because it handles the extreme tension. Polyester resists breaking while it pulls the foam down into a crisp, rounded shape.
Choosing the Right Headwear Canvas
Your hat serves as the foundation for the entire project. The design will fail if the fabric collapses under the heavy stitch density. High-quality 3D puff embroidery requires a sturdy surface to maintain its structural integrity. You must select headwear that can support the weight of the foam and thread.
Structured vs. Unstructured Hats
Always choose structured caps for this specific technique. These hats feature a stiff buckram backing behind the front panels. This support prevents the fabric from puckering or sagging during sewing. Unstructured hats lack the strength to hold a heavy, raised design in place.
Fabric Considerations
Certain fabrics perform better when you apply thick foam layers. Wool blends and heavy cotton twill are the top choices for professional results.
- Snapbacks: These offer a flat, stable surface for large logos.
- Trucker Hats: The foam front panels provide excellent support for 3D effects.
- Fitted Caps: The industry standard for high-end athletic branding.
The Secret Sauce: Mastering 3D Digitizing
Digitizing for 3D puff embroidery requires a unique architectural mindset. You must visualize how the thread will wrap around a physical object. You are not just marking start and stop points on a flat plane. Instead, you are designing complex end caps to seal the foam within the thread.
Creating ‘End Caps’ and Closures
Every open end of a satin stitch needs a proper closure. Digitizers use a “pinching” technique to pull the thread tight at the edges. This action prevents the foam from showing beneath the embroidery. Without these caps, the raw foam will poke out from the ends of your letters.
Density and Underlay Strategy
You must increase your stitch density by nearly 200% compared to flat work. This heavy coverage ensures the foam stays completely covered and compressed. Use specialized “Walk Stitches” along the border of your design first. These stitches create a perforation line that makes it easy to pull away the excess foam.
Machine Setup and Calibration
A standard flat embroidery setup will fail when foam is introduced. You will likely experience birdnesting or broken needles immediately. The machine requires specific adjustments to accommodate the additional height of 3D puff embroidery. Skipping these steps will cause tension issues and ruin your expensive headwear.
Adjusting Presser Foot Height
You must raise the presser foot to clear the 3mm foam. If the foot is too low, it will drag the foam and shift the design. Proper clearance allows the needle to strike the fabric without prematurely crushing the foam. This height adjustment ensures the thread wraps smoothly over the material.
Tuning Top Tension
Loosen your top tension slightly to achieve a perfect “wrap” effect. The thread needs extra slack to travel over the foam volume. If the tension is too tight, the thread will cut through the foam instead of covering it. Balanced tension creates the soft, rounded edges that define high-quality work.
Step-by-Step Production Execution
Consistency is the key to a successful shop floor. You must treat every hat with the same level of precision to maintain quality. The flow of 3D puff embroidery requires steady hands and a focused mind. A small error during setup will appear in the final product.
Proper Hooping Techniques
You must achieve “drum-tight” tension when hooping your caps. If the fabric moves at all, the foam will shift out of alignment. Use high-quality clips to secure the cap to the frame. A firm surface ensures the needle hits the exact perforation points every time.
Securing the Foam
Most professionals use a small piece of masking tape to hold the foam in place. This method is clean and leaves no residue on the garment. Some shops prefer a light spray adhesive for complex designs. However, tape is usually faster and safer for high-volume production runs.
Optimized Machine Speeds
Do not run your machine at full speed for puff designs.
Pro Tip: Set your machine to the 600-700 SPM “sweet spot.” This slower speed prevents thread breaks and ensures the needle cleanly shears the foam.
Post-Production Finishing Touches
The “retail feel” happens in the final sixty seconds of the process. You must carefully remove the excess material to reveal the clean design. Customers judge your work by the sharpness of the edges and the lack of stray foam. Professional finishing transforms a raw stitch-out into a luxury item.
The ‘Rip and Clear’ Method
Pull the excess foam away from the design in a steady motion. If your digitizing is correct, the foam should pop out easily. Use a small tool to poke any stubborn pieces back under the stitches. This step leaves you with a crisp, three-dimensional logo.
The Heat Gun Secret
A quick blast from a heat gun will shrink any tiny foam hairs. The heat makes the foam retreat under the thread for a flawless look. Be careful not to burn the thread or the hat fabric.
- Tweezers: Use these for pulling small foam bits from tight corners.
- Heat Gun: This tool seals the edges and hides the foam.
- Snippers: Use sharp blades to trim any tiny thread tails.
Design Limitations: When to Say “No” to Puff
Not every logo works for 3D puff embroidery. You should avoid designs with very thin lines or tiny details. Small text will look messy because the thread cannot cover the foam in tight spaces. Always suggest flat stitching for intricate artwork to maintain your professional standards. Using 3D puff embroidery on the right bold shapes will always yield the best results.
The Hybrid Design Approach
You can combine flat and puff styles for the ultimate professional logo. Use flat stitching for fine text and small details in the background. Then, apply 3D puff embroidery to the primary icon or main initials. This contrast creates a sophisticated, multi-layered look that high-end brands love.
Costing and Pricing for Profitability
Value your expertise and time, not just the raw materials you use. Many shop owners forget that specialty work requires a higher level of skill. You are providing a premium service that demands a premium price point. Pricing your work correctly ensures your business stays healthy and profitable.
Calculating the ‘Puff includes extra digitizing time for complex files, slower machine speeds, and foam costs. Most shops add a 20% to 50% surcharge for 3D work. This covers labor and spoilage risk for premium caps. I’ve caps.
Market Value Comparison
| Service Type | Average Retail Price | Production Time | Perceived Value |
| Standard Flat | $20 – $25 | Fast | Moderate |
| Premium 3D Puff | $35 – $45 | Slow | High |
Troubleshooting Common 3D Puff Pitfalls
Even the best technicians face challenges on the production floor. Think of this as your real-world guide to saving a difficult run. Quick thinking can prevent a small mistake from ruining an entire batch of hats. Master these fixes to keep your machines running and maintain high quality.
Solving ‘Foam Peek-Through’
If you see foam peeking through, your stitch density is likely too low. Try increasing the density in your software by 10% increments. You should also verify that your foam color matches your thread perfectly. If the issue persists, check if the needle is sharp enough to cut the foam.
Managing Thread Breaks
Frequent thread breaks usually point to a burred the needle or high friction. The needle generates significant heat as it passes through dense foam and thread. Use a drop of silicone spray on the thread to reduce drag. Always swap to a fresh needle if you notice any fraying or consistent snapping.
Care, Longevity, and Customer Education
Your brand reputation depends on how the hat looks six months later. Customers need to know how to maintain the shape of their new gear. Educating your buyers helps them appreciate the craftsmanship of 3D puff embroidery. Proper care ensures the design stays crisp and bold for years to come.
Washing and Maintenance
Always recommend a “hand-wash only” rule for any 3D decorated headwear. Machine washing can crush the internal foam and distort the stitch pattern. Tell clients to use a damp cloth and mild soap for spot cleaning. This gentle approach preserves the design’s height and structure.
Shipping and Packaging Tips
Prevent “puff compression” by using larger boxes during transit. Do not stack heavy items directly on top of the decorated panels. Use cardboard inserts to help the hat maintain its shape inside the mailer. Taking these small steps ensures the 3D puff embroidery looks perfect when the customer opens the box.
Conclusion: Elevate Your Brand with Dimension
Mastering 3D puff embroidery allows you to transform standard headwear into a premium retail product with undeniable shelf presence. When executed correctly, raised embroidery adds structure, authority, and visual dominance that flat stitching cannot replicate. The difference is immediately visible and instantly felt.
This technique demands proper digitizing, the right materials, and disciplined production control. But the reward is a product that stands out in competitive retail environments and justifies a higher price point.
If you are developing bold headwear collections or upgrading your current product line, choosing the right base caps is just as important as the embroidery technique itself.
When depth, durability, and brand impact matter, dimensional embroidery is the upgrade that defines serious headwear.